Top articlesSee all...

A Comprehensive Guide to Dog Exercise

How To Crate train An Older Dog - A Comprehensive Guide

How To Socialize A Dog - A Comprehensive Guide

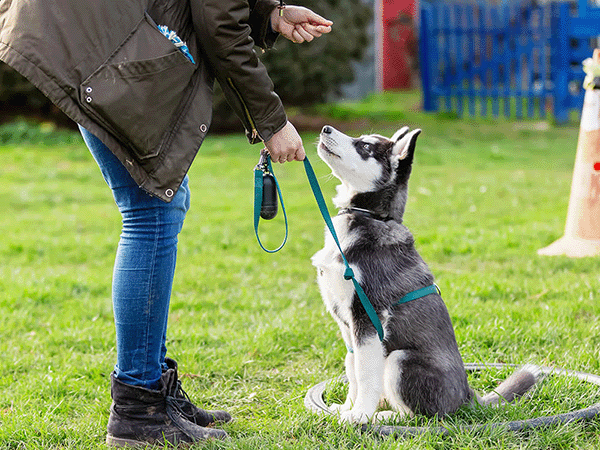
Leash Training: A Guide to Training Your Dog to Walk on a Leash

Skijoring: A Guide to Skijoring with Dogs

The Best Dog Enrichment Toys

The Best United States Dog Parks

The Best Indoor Dog Parks in the United States

The Best Off-Leash Dog Parks in the United States
Top articles
A Comprehensive Guide to Dog Exercise
How To Crate train An Older Dog - A Comprehensive Guide
How To Socialize A Dog - A Comprehensive Guide
Leash Training: A Guide to Training Your Dog to Walk on a Leash
Skijoring: A Guide to Skijoring with Dogs
The Best Dog Enrichment Toys
The Best United States Dog Parks
The Best Indoor Dog Parks in the United States
The Best Off-Leash Dog Parks in the United States
See all...What to Know About Homemade Dog Treats (With Recipes)

/fit-in/0x450/wp-content/uploads/2023/12/homemadedogtreats.jpg)
Pet parents across the internet—and in person—love to share their favorite homemade dog treat recipes. Cooking for our pups is more common than ever! If you're excited about the idea of putting on your chef's hat to craft something special for your furry friend, we've got you covered.
Here's everything to know about homemade dog treats, including:
- Why it's a good idea to change up your dog's food
- Benefits of making dog treats yourself
- Costs and risks of homemade dog treats
- Popular dog-safe ingredients
- Toxic ingredients to avoid
- Popular varieties of homemade dog treats
- A few go-to homemade dog treat recipes
- How to feed your homemade dog treats
After all, our canine companions are full members of the family. Why not cook for them now and then?
Why change up your dog's treats?
Dogs are natural scavengers
Canines—including our domestic dogs—are scavengers and predators. This means they're not suited to eating the exact same meal day after day!
Homemade dog treats can be a budget-friendly, healthy way to satisfy your dog's instinct to try something new.
Different treats can improve training motivation
Variety is the spice of life!
Your dog can get especially sick of the same old, same old when it comes to training sessions. If you're working on building any new skills with your pup, it's a smart idea to switch your rewards from time to time to keep your four-legged student on their toes. Adding new treat options can boost motivation!
You can read more about rewards and reinforcement in our dog training 101 article.
Pros of homemade dog treats
Some dog parents prefer making their own healthy treats at home because:
You know every ingredient
You can feel confident about what your pup is eating and how every treat was prepared! When you prepare treats yourself, you have complete control over the quality and source of ingredients. This makes it easier to ensure your dog receives wholesome, nutritious treats.
It might be easier for dogs with sensitive stomachs
You can tailor homemade dog treats to your dog's specific dietary needs or restrictions if they have any allergies or other sensitivities.
You can avoid preservatives
Homemade treats often lack the artificial additives, preservatives, and fillers commonly found in commercial dog treats, promoting better overall health for your pet.
You might save money in the long run
Making your own treats can be more cost-effective than store-bought treats in the long run, especially if you buy ingredients in bulk or use leftovers from your own meals.
Cons and potential risks of homemade dog treats
While we're big fans of homemade dog treats, you should still consider some possible drawbacks before racing to your kitchen.
Introducing lots of new ingredients can cause allergic reactions in some dogs
Just like humans, dogs can have allergies and sensitivities to certain foods. Some pups need especially gradual transitions for any diet change. We might be super excited to share our new recipe finds with our four-legged friends—but sometimes it is best to stick to the status quo.
One way around this? Introduce brand-new foods one by one so you can isolate any problems they cause!
Sometimes it's hard to estimate caloric content
Homemade treats can contribute to your dog's overall caloric intake, which might lead to weight gain. The Association for Pet Obesity Prevention estimates that more than half of North American dogs are overweight, leading to a range of problems like increased joint pain. When you buy treats at the store, you usually know exactly how many calories are in each bite.
Cooking anything—for dogs or people—carries a risk of foodborne illness and contamination
Improper handling or storage of ingredients can lead to contamination, which may cause foodborne illnesses in your pup or you. Always follow proper food safety guidelines.
Preparing homemade dog treats takes time
While it's often cheaper in the long run from a financial standpoint, you should consider the value of your time as well. Some pet parents are too busy—or simply don't enjoy—making treats themselves. That's okay! You don't have to cook to still be a fabulous dog parent.
Common dog-safe ingredients for homemade dog treats
Here are some go-to ingredients you'll find in many homemade dog treat recipes.
- Proteins: Cooked and lean meats (like chicken, turkey, beef), cooked eggs, fish, natural peanut butter (without xylitol, which is toxic to dogs)
- Grains: Oats, brown rice
- Flours: All-purpose flour, whole wheat flour, oat flour, rice flour, coconut flour
- Fruits: Apples, strawberries, blueberries, ripe bananas
- Vegetables: Pumpkin (especially plain pumpkin puree—not pumpkin pie filling), sweet potatoes
- Dairy: Plain yogurt, small amounts of cheese
Experiment with what your individual dog loves
Note that this is not an exhaustive list! If your dog has a favorite snack not listed here—and you've checked that it's safe for them to eat—feel free to include it in your homemade dog treat recipes. Mix and match to find what your own companion loves best.
Just be sure to slowly introduce new treats and monitor your dog for any adverse reactions.
Unhealthy or toxic ingredients to avoid in your treats
Do not use the following dangerous ingredients in your homemade dog treats:
- Chocolate contains theobromine and caffeine, which can be toxic to dogs. Unsweetened baking chocolate and cocoa powder are the most dangerous. Symptoms include vomiting, diarrhea, increased heart rate, and, in severe cases, seizures and even death.
- Xylitol is a sugar substitute found in many sugar-free products, including some peanut butter brands. Xylitol can cause insulin release, leading to hypoglycemia (low blood sugar), seizures, and liver failure.
- Grapes and raisins can cause kidney failure in some dogs. Even small amounts can be toxic and lead to symptoms such as vomiting, lethargy, and loss of appetite.
- Onions and garlic contain compounds that can damage red blood cells, leading to anemia, weakness, lethargy, and gastrointestinal issues.
- Even small amounts of alcohol can cause toxicity in dogs, leading to symptoms such as vomiting and loss of coordination.
- Many nuts are unsafe for dogs to eat. Macadamia nuts are particularly toxic and can cause weakness, vomiting, tremors, and hyperthermia.
- Sugar isn't healthy for canines, especially in large amounts. Some pure maple syrup or honey are usually fine in moderation.
Always check with your veterinarian if you're unsure about the safety of a particular ingredient for your dog. This is extra important if they have any specific dietary restrictions or health conditions!

Popular kinds of homemade dog treats
Most homemade dog treats are baked. Some pet parents love to dehydrate leftover meats, too—or even freeze soft foods into bite-sized chunks.
Here are some common varieties of homemade treats!
Small training treats
These treats are small and usually low in calories, making them perfect for training sessions.
Dehydrated meat broken into tiny pieces works especially well. So do soft biscuits baked then chopped.
Frozen dog treats
From full-scale frozen Kong and Toppl creations to small bites of pumpkin simply frozen in an ice cube tray, these homemade dog treats are sure to keep your pup cool on warm days. (Frozen options usually aren't the best solution for fast-paced training sessions, though, since they'll melt in your hands or treat pouch.)
Larger treats, like cakes, for special occasions
Some dog parents bake special pet-safe birthday cakes or holiday treats. These tend to be larger snacks given only once in a while—as opposed to the way training treats might be a regular part of your pup's daily diet.
Homemade healthy treat recipes
The options are endless! Here are a few favorite homemade dog treat recipes to start with.
1) Simple recipe for dehydrated meat treats
Dehydrating meat at home to make dog treats is a straightforward process. Here's a basic guide!
Ingredients and supplies
- Lean meat (chicken, turkey, beef, or venison are common choices)
- Sharp knife
- Cutting board
- Dehydrator
- Paper towels (optional)
Steps
- Choose lean meat: Select lean cuts of meat to minimize fat content. Excess fat can lead to spoilage during the dehydration process.
- Prep your meat: Slice the meat into thin, uniform strips or small cubes. The thickness should be consistent to ensure even dehydration.
- Arrange on dehydrator trays: Place the meat slices or cubes on the dehydrator trays, ensuring they are spaced apart to allow proper air circulation.
- Set temperature: Set the dehydrator to the appropriate temperature, typically between 145 to 165 degrees Fahrenheit. Higher temperatures can help kill bacteria and ensure the meat is safe for your dog!
- Dehydrate: Dehydrate the meat for several hours, depending on the thickness of the slices and the type of meat. The process can take as little as four hours or as long as a full day. Most small training treats will be ready on the shorter end of that window.
- Check for dryness: Periodically check the meat for dryness. It should be firm and dry to the touch, with no moisture remaining.
- Cool before storing: Allow the dehydrated meat to cool completely before storing or serving. This helps prevent condensation and mold growth.
- Store properly: Store the dehydrated meat treats in airtight containers or vacuum-sealed bags to maintain freshness. Keep them in a cool, dry place. Enjoy giving them to your dog!
2) Simple recipe for frozen pumpkin yogurt treats
These get a little messy at room temperature, so they aren't ideal for training sessions away from home. They can be a great addition to meals or enrichment toys, though!
Plus they take barely five minutes to put together. Talk about a good way to spend a commercial break.
Ingredients and supplies
- Plain pumpkin (puree, not pie filling that has added sugar and spices)
- Plain greek yogurt
- Silicone molds, small ice cube tray, or baking sheet lined with parchment paper
Steps
- Mix: Mix the pumpkin and yogurt together.
- Dish mixture into tray: Spoon the pumpkin-yogurt mixture into a silicone mold or small ice cube tray. If you don't have either of those, you can make small dollops on a baking sheet lined with parchment paper.
- Freeze until solid: This usually takes a few hours.
- Store in the freezer: Once the treats are set, you can take them out of their mold or off the baking sheet and store them in an airtight container in your freezer.
3) Baked pumpkin peanut butter dog treats
Ingredients and supplies
- 1 cup canned pumpkin (make sure it's pure pumpkin, not pumpkin pie filling)
- 1/2 cup natural or organic peanut butter (unsalted, with no added sugar or xylitol)—if your dog really loves it, you can add some extra peanut butter without affecting the treat texture too much
- 1 3/4 cups whole wheat flour (you can also use oat flour, coconut flour, or rice flour for a gluten-free option)
- 1 egg
- Oven
- Baking sheet
- Rolling pin
- Cookie cutters
- Food processor (optional depending on your flour choice)
Steps
- Preheat the oven: Preheat your oven to 350°F (175°C).
- Combine wet ingredients: In a mixing bowl, combine the canned pumpkin, peanut butter, and egg. Mix well until the ingredients are thoroughly combined.
- Add dry ingredients: Gradually add the whole wheat flour (or oat flour, coconut flour, rice flour, whatever option you chose) to the wet ingredients. If you're using oat flour, you can make it by grinding rolled oats in a blender or food processor until you achieve a flour-like consistency.
- Knead the dough: Once the ingredients are well combined, knead the dough on a floured surface until it comes together.
- Roll out the dough: Roll out the dough to about 1/4 inch thickness.
- Cut shapes: Use fun cookie cutters to cut out shapes from the dough. If you don't have these, you can also simply use a knife or pizza cutter to cut freehand squares or circles.
- Place on prepared baking sheet: Place the cut-out shapes on a parchment paper-lined baking sheet. They shouldn't expand much, but leave at least a little space between each treat.
- Bake: Bake in the preheated oven for approximately 10-12 minutes or until the treats are golden brown.
- Cool: Allow the treats to cool on a wire rack.
- Store: Once completely cooled, store these homemade peanut butter dog treats in an airtight container. You can also refrigerate or freeze them for longer shelf life.
How to feed your homemade dog treats
You're limited only by your imagination (and your dog's dietary restrictions). Homemade dog treats can be great for:
- Giving as reinforcement during training sessions
- Rewarding your dog for behavior they offer throughout the day
- Spicing up their regular kibble as a meal topper
- Including in enrichment toys and puzzles
- Building a positive association with a crate
- And more!


/fit-in/0x128/wp-content/uploads/2022/07/shutterstock_187910180.jpg)
/fit-in/0x128/wp-content/uploads/2020/07/shutterstock-627476036_orig.jpg)
/fit-in/0x128/wp-content/uploads/2024/12/Moving-with-your-pet-3.png)
/fit-in/0x128/wp-content/uploads/2020/07/shutterstock_1223036338.jpg)
/fit-in/0x128/wp-content/uploads/2022/04/shutterstock_1010330773.jpg)
Most recent articles
/fit-in/0x256/wp-content/uploads/2022/07/shutterstock_187910180.jpg)
/fit-in/0x256/wp-content/uploads/2020/07/shutterstock-627476036_orig.jpg)
/fit-in/0x256/wp-content/uploads/2024/12/Moving-with-your-pet-3.png)
/fit-in/0x128/wp-content/uploads/2025/03/Moving-with-your-pet-1.png)
/fit-in/0x256/wp-content/uploads/2025/03/Moving-with-your-pet-1.png)
/fit-in/0x128/wp-content/uploads/2022/07/shutterstock_237584221-1.jpg)
/fit-in/0x256/wp-content/uploads/2022/07/shutterstock_237584221-1.jpg)
/fit-in/0x128/wp-content/uploads/2024/07/Screen-Shot-2024-07-24-at-4.06.05-PM.png)
/fit-in/0x256/wp-content/uploads/2024/07/Screen-Shot-2024-07-24-at-4.06.05-PM.png)
Related articles
Top dog guides per area
Dog training guides

Dog Food Aggression: Why You Shouldn't Punish It
Does your dog ever growl when you walk by their food dish? Maybe they get possessive of treats, carrying them far away and giving you side-eye when you start to approach — or snarling at your other pets or children if they get too close.

Best Dog Fields in the US: 25+ Wide-Open Spaces for Your Pup to Run Free
The best dog fields in the US offer something that traditional enclosed parks simply can't match: acres of open space where your pup can truly stretch their legs and run at full speed. From Colorado's 470-acre prairie meadows to Tennessee's award-winning "Outback," these wide-open spaces allow dogs to roam, explore, and exercise naturally while engaging instincts that cramped urban parks suppress.

The Ultimate Guide to Scent Training for Dogs
Your dog's nose is an amazing tool. Did you know they have 40 times the olfactory receptors than humans? Scent training for dogs taps into this superpower, turning everyday moments into exciting sniff-fests. It's enriching for all types of dogs – reactive, shy, or simply adventurous. Ready to explore the world of scent work for dogs? Let's get started.

Service Dog Training Costs: DIY vs. Pro
More than 80 million Americans rely on their service dogs to help them navigate the world. Task-trained assistance animals perform a huge range of life-changing—in many cases, life-saving—services: These dogs act as eyes for visually impaired handlers, provide mobility support, alert to seizures and blood sugar crashes, interrupt anxiety attacks, remind their people to take medications, and so much more.

How to Deal With Puppy Potty Training Regression
You thought those dreaded middle-of-the-night potty breaks were over. You were finally free from cleaning up puppy puddles. Then, suddenly, your furry friend starts having accidents again. It's frustrating, right? This puppy potty training regression is more common than you think. Don't worry; we'll help you get your pup back on track. We'll cover the common causes, offer practical solutions, and give you actionable steps to tackle this challenge together.

Dirty Dog Syndrome: Causes, Solutions, and Prevention
It's a cringe-worthy moment every dog owner dreads: your furry friend chowing down on something truly disgusting. If your dog has a penchant for poop, you're dealing with coprophagia. It's more common than you think, and thankfully, often manageable. This article explores the reasons behind dirty dog syndrome, from instinct to learned behavior. We'll also give you practical tips to help break this unpleasant habit.

How to Train Your Rescue Dog: A Complete Guide
* All Sniffspot articles are reviewed by certified trainers for quality, please see bottom of article for details *
/354x256/wp-content/uploads/2020/08/bernese-mountain-dog-208092_1280.jpg)
/354x256/wp-content/uploads/2025/09/Screenshot-2025-09-21-at-6.39.54-PM.png)
/354x256/wp-content/uploads/2022/04/shutterstock_543831754.jpg)
/354x256/wp-content/uploads/2022/08/shutterstock_494495788-1.jpg)
/354x256/wp-content/uploads/2022/07/shutterstock_237584221-1.jpg)
/354x256/wp-content/uploads/2022/10/shutterstock_705844504.jpg)
/354x256/wp-content/uploads/2022/06/shutterstock_1295604073-1-1.jpg)
Dog enrichment guides

Best Dog Water Parks in the US: 15+ Amazing Splash Destinations for Your Pup
Do you have a water-loving dog looking to burn some energy? There are countless dog parks to visit throughout our country — but some of them become far too hot in the midday sun to be safe for your pets to play. That’s why we’ve put together a list of some of the best dog water parks throughout the United States! At these locations, your pup can frolic, splash, and swim to their heart’s content.
Best Dog Fields in the US: 25+ Wide-Open Spaces for Your Pup to Run Free
The best dog fields in the US offer something that traditional enclosed parks simply can't match: acres of open space where your pup can truly stretch their legs and run at full speed. From Colorado's 470-acre prairie meadows to Tennessee's award-winning "Outback," these wide-open spaces allow dogs to roam, explore, and exercise naturally while engaging instincts that cramped urban parks suppress.

Best Toys for Herding Dogs: Keeping Your Pup Happy & Engaged
Herding dogs are amazing, intelligent companions. But that also means they need more than just a simple game of fetch. Finding the right toys for herding dogs is key to keeping them happy and stimulated. This article explores some of the best toys for herding dogs, including options specifically for breeds like Border Collies and Australian Shepherds. We'll help you discover the perfect herding toys for dogs to tap into their natural instincts and keep them entertained for hours.

Tough Dog Toys for Aggressive Chewers: A Practical Guide
Does your dog destroy every toy you give them? Is your house littered with the remnants of plush toys? Are you tired of wasting money on "indestructible" dog toys for aggressive chewers that don't last? Then this post is for you. We'll cover everything you need to know about finding the best dog toys for aggressive chewers, so you can finally give your pup something safe, durable, and fun.

Daily Exercise Calculator: How Much Exercise Does Your Dog Need?
Everyone knows dogs need exercise, but how much is enough? Walks are great, but creating a truly balanced fitness plan means understanding your dog's specific needs. This post helps you develop a daily exercise calculator for your dog, considering breed, age, and lifestyle. We'll cover fun activities, understanding exercise intensity, and recognizing when your pup has had enough. Let's create a plan that keeps your dog happy and healthy!

Complete Guide To Herding With Dogs
* All Sniffspot articles are reviewed by certified trainers for quality, please see bottom of article for details *

Dog Enrichment Activities: The Ultimate Guide
Ever feel like your dog is restless or bored? They may be getting enough exercise, but still need more. That's where enrichment activities for dogs come in. Giving your dog opportunities to sniff, explore, and problem-solve can make a world of difference. Whether you have a puppy, adult, or senior dog, enriching their environment is key for their well-being. Let's explore how to add cognitive enrichment for dogs, even tailoring activities to your dog's breed with breed specific enrichment and fun enrichment games for dogs.
/354x256/wp-content/uploads/2023/04/dogwaterpark.png)
/354x256/wp-content/uploads/2022/05/shutterstock_174836186.jpg)
/354x256/wp-content/uploads/2023/02/shutterstock_1346929262.jpg)
/354x256/wp-content/uploads/2022/08/dogexercisecalculatorfeaturedimage.jpg)
/354x256/wp-content/uploads/2020/07/bb.jpg)
/354x256/wp-content/uploads/2022/07/shutterstock_1091009294.jpg)
Dog reactivity guides

Rottweiler Aggression: Truth vs. Myth
Many dogs have gotten a bad reputation over the years for being "dangerous breeds." Rottweilers are among them. Like pit bulls and other large, blocky-headed types of dogs, these powerful and beautiful animals are often assumed to be aggressive.
Best Dog Fields in the US: 25+ Wide-Open Spaces for Your Pup to Run Free
The best dog fields in the US offer something that traditional enclosed parks simply can't match: acres of open space where your pup can truly stretch their legs and run at full speed. From Colorado's 470-acre prairie meadows to Tennessee's award-winning "Outback," these wide-open spaces allow dogs to roam, explore, and exercise naturally while engaging instincts that cramped urban parks suppress.

What Is a Reactive Dog? A Practical Guide for Owners
Does your dog suddenly transform into a barking, lunging Tasmanian devil on walks? It's stressful for both of you. If this sounds familiar, you might have a reactive dog. Understanding what is a reactive dog is the first step to calmer walks. We'll explore the common triggers and give you actionable strategies to manage and modify this behavior. Let's turn those stressful walks into enjoyable outings.

How to Socialize a Reactive Dog: A Step-by-Step Guide
Does your dog display reactivity to other pets or people? Maybe they’re a new rescue pup and are still settling into your home. Or they were sick growing up, so you missed their critical socialization period. Possibly they’ve had a bad experience after being raised as a normal puppy.

What Is a Reactive Dog? A Complete Guide
Is your dog overly excited or fearful around other dogs? Do they bark, lunge, or whine? You might have a reactive dog. Many dog owners face this challenge. Understanding what a reactive dog is is the first step to helping them. This guide explores the common causes of dog reactivity, explains what makes a dog reactive, and offers practical tips and resources. Let's work together to build a stronger bond with your dog and enjoy stress-free walks.

9 Best Online Communities for Reactive Dog Parents
Does your dog's reactivity make walks stressful? You're not alone. Many dog owners face similar challenges. This guide offers practical advice and support for managing reactivity, including finding the best online dog training for reactive dogs. We'll connect you with reactive dog support groups, share training tips, and explore resources like the best dog training app for reactive dogs. Let's build a stronger bond with your dog, together.
* All Sniffspot articles are reviewed by certified trainers for quality, please see bottom of article for details *
How To Groom a Reactive Dog
* All Sniffspot articles are reviewed by certified trainers for quality, please see bottom of article for details *
/354x256/wp-content/uploads/2023/05/Screen-Shot-2024-05-23-at-9.33.57-PM.png)
/354x256/wp-content/uploads/2022/08/dogreactivitychartfeaturedimage.jpg)
/354x256/wp-content/uploads/2022/08/shutterstock_523383649.jpg)
/354x256/wp-content/uploads/2020/07/a.jpg)
/354x256/wp-content/uploads/2022/01/shutterstock_796422001.jpg)
/354x256/wp-content/uploads/2020/07/shutterstock-641073763_orig.jpg)
Sniffspot community guides

The State of Public Dog Parks Across the United States
From 2009 to 2020, there was a 40 percent increase in the development of public dog parks. Designated spots for canine exercise have become commonplace in every major city in North America — many pet owners won’t even consider renting an apartment that doesn’t have its own fenced-in pet area for their canine companions.
Best Dog Fields in the US: 25+ Wide-Open Spaces for Your Pup to Run Free
The best dog fields in the US offer something that traditional enclosed parks simply can't match: acres of open space where your pup can truly stretch their legs and run at full speed. From Colorado's 470-acre prairie meadows to Tennessee's award-winning "Outback," these wide-open spaces allow dogs to roam, explore, and exercise naturally while engaging instincts that cramped urban parks suppress.

How This Family is Affording Their Dream Property Through Renting it Hourly to Dogs
Thousand Oaks, California has been a safe haven for Sniffspot host, Jen, since childhood. Having grown up in busy Santa Barbara, Jen, an introvert from an early age, would seek out solitude and serenity away from tourists attractions and droves of people visiting from elsewhere. “My grandparents own 60 acres about a 30 minute drive from here, and I grew up spending every summer and every holiday visiting them on the ranch,” Jen explained. “In Santa Barbara, we wouldn't go to the beach on the weekend because that's where everybody was, so you'd find places off the beaten path where the tourists weren't. For me, the ranch was just my happy place.”

Host Tips: Ellen K. What Makes Sniffspot Successful for Me
Ellen is the host of Country Pasture Getaway, one of Sniffspot's most popular sniff spots. She has taken the time to write up the lessons she has learned about how to be a great sniff spot host.

How this Oregon Farmer is Making a Business From Renting Her Land to Dogs
Just 20 minutes outside of the busy city of Portland, Oregon, and settled right on the banks of the Columbia River, you’ll find what countless visitors have flocked to the area in search of – mountain views, crisp, clean air, and running water for miles. What you might not expect to find, however, is a hidden oasis designed just for dogs and their people, owned and operated by a farming couple and enjoyed by visitors on two legs, and four.

Host Tips: Fran T. Providing Great Guest Service at our Spot
Fran is the host of Ranch Setting, one of Sniffspot's most popular spots. She has taken the time to write up the lessons she has learned about how to be a great Sniffspot host.

How Sniffspot Helped a Nervous Rescue Work Through His Fears and Change His Family’s Life
This is the story of a family and dog rescuing each other.
/354x256/wp-content/uploads/2022/07/Sniffspot_infographic_1-01.jpeg)
/354x256/wp-content/uploads/2021/05/Final-Edit-003-1.jpg)
/354x256/wp-content/uploads/2020/07/good-photo-3_orig.jpg)
/354x256/wp-content/uploads/2021/05/sniffspot-28-of-45-1.jpg)
/354x256/wp-content/uploads/2020/07/screen-shot-2019-09-19-at-2-01-47-pm_orig.png)
/354x256/wp-content/uploads/2022/08/N0A9291.jpg)
Top dog trainers in the US
The Best Dog Trainers in the United States of 2026
This is a list of the top dog trainers in the United States, based on votes from the Sniffspot community and the general public.
The Best Dog Trainers in Seattle, WA of 2026
This is a list of the top dog trainers in Seattle, WA, based on votes from the Sniffspot community and the general public.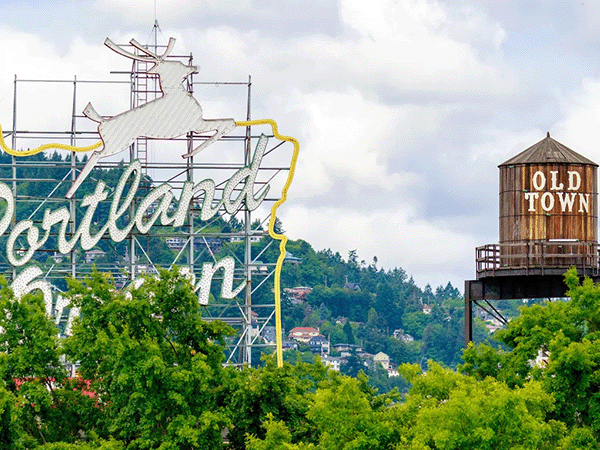
The Best Dog Trainers in Portland, OR of 2026
This is a list of the top dog trainers in Portland, OR, based on votes from the Sniffspot community and the general public.
The Best Dog Trainers in Los Angeles, CA of 2026
This is a list of the top dog trainers in Los Angeles, CA, based on votes from the Sniffspot community and the general public.
The Best Dog Trainers in New York, NY of 2026
This is a list of the top dog trainers in New York, NY, based on votes from the Sniffspot community and the general public.


City dog parks guides

Top 10 Indoor Dog Parks: A US Guide
Looking for a space to play with your dog no matter what the weather’s like outside? Look no further than our list of the best indoor dog parks in the United States! These climate-controlled spaces are growing in popularity as pet ownership increases throughout the country. As a bonus, many of them also offer dog training, boarding, grooming, or daycare services on the premises.
Best Dog Fields in the US: 25+ Wide-Open Spaces for Your Pup to Run Free
The best dog fields in the US offer something that traditional enclosed parks simply can't match: acres of open space where your pup can truly stretch their legs and run at full speed. From Colorado's 470-acre prairie meadows to Tennessee's award-winning "Outback," these wide-open spaces allow dogs to roam, explore, and exercise naturally while engaging instincts that cramped urban parks suppress.

Best Dog Parks in the US: Ultimate Guide to Public & Private Off-Leash Adventures
Is your pup giving you those pleading "let me run free" eyes? Whether you're a new dog parent or a seasoned pro looking for fresh adventures, finding the perfect off-leash paradise for your furry friend can feel ruff! From sun-soaked California beaches where your water-loving lab can make a splash to mountain trails in Vermont where your adventure buddy can chase every scent, we've sniffed out the 15 best dog parks across America.

Dog Parks Near Me: Las Vegas Edition
Looking for the perfect dog park near me in Las Vegas? You're in luck! This guide explores all the best options for your pup, from public dog parks to private dog parks near me on Sniffspot. We'll help you find the ideal spot for playtime, socializing, and fresh air. Plus, we'll cover essential etiquette and safety tips to ensure a happy visit for everyone. Get ready for some tail-wagging fun!
Top Sniffspot Locations: Find the Perfect Dog Park
Looking for the perfect dog park? Whether you need a wide-open public space or a private, fenced-in spot, this guide will help you find the best dog parks across the US. We'll cover top-rated public parks, the perks of private dog parks, and even explore Sniffspot locations – giving your pup a safe and fun place to play. Ready to find your dog's new favorite spot? Let's go!

Sniffspot: Portland's Best Private Dog Parks
Ready to discover Portland's best dog parks? Whether you're looking for a public park or the unique experience of a private Sniffspot, this guide has you covered. We'll help you find the perfect spot for your pup, with tips on what to bring, how to prepare, and even understanding dog body language. Plus, we'll explore some top Portland dog parks, including public and Sniffspot options, so you can plan your next dog-friendly adventure in the City of Roses.
Portland Dog Parks: Public & Private Options
This page is about public city dog parks and also includes Sniffspot private dog parks. Sniffspot is the largest network of private dog parks for rent in the world!
Small Dog Park Guide: Tips for Finding the Perfect Spot
Finding the perfect dog park for your small breed can be ruff! Big dog parks can be overwhelming, even dangerous, for little pups. This comprehensive guide helps you sniff out the best small dog parks for your pint-sized companion, covering everything from essential safety checklists to top recommendations for small dog parks across the US—including both public spots and private dog parks.
/354x256/wp-content/uploads/2023/04/indoordogparks.png)
/354x256/wp-content/uploads/2023/03/offleashdogparks.png)
/354x256/wp-content/uploads/2023/02/vegas.jpg)
/354x256/wp-content/uploads/2023/02/portland.jpg)
/354x256/wp-content/uploads/2023/03/smalldogparks.png)
Dogs breeds

German Shepherd Guide: Best Family Dog? Truth from 9K Owners
The German Shepherd Dog (GSDs) are known for their intelligence, loyalty, and striking appearance. They're also incredibly versatile, excelling as working dogs and devoted family companions. This guide covers everything you need to know about GSDs, from understanding their unique traits and rich history to practical advice on training and care. So, whether you're a seasoned GSD owner or just starting your research, let's explore this remarkable breed together.
Best Dog Fields in the US: 25+ Wide-Open Spaces for Your Pup to Run Free
The best dog fields in the US offer something that traditional enclosed parks simply can't match: acres of open space where your pup can truly stretch their legs and run at full speed. From Colorado's 470-acre prairie meadows to Tennessee's award-winning "Outback," these wide-open spaces allow dogs to roam, explore, and exercise naturally while engaging instincts that cramped urban parks suppress.

Labrador Retriever: America's Best Family Dog? Owner Truth
Discover the Labrador Retriever, a breed celebrated for its playful nature, affectionate temperament, and trainability. Labradors are known for their friendly demeanor and adaptability, making them perfect family companions and versatile working dogs. As one of the most popular types of retrievers, Labs are ideal companions for various lifestyles and are recognized by the American Kennel Club (AKC) as an excellent breed for families.

Golden Retriever Advice: The Complete Owner's Guide
Golden Retrievers: they're gorgeous, playful, and incredibly popular. But before you welcome one into your home, you need the right golden retriever advice. This guide draws on the wisdom of nearly 10,000 Golden Retriever owners, offering practical tips for caring for these affectionate dogs. From understanding their high energy levels to mastering grooming and training, we'll cover everything you need to know. So whether you're already a devoted Golden parent or just starting your research, get ready to learn how to give your furry friend the best possible care.

Are American Staffordshire Terriers Good for First-Time Owners: Complete Guide
Think American Staffordshire Terriers are tough? Think again. While their muscular build might intimidate some, these dogs are known for their playful and loyal personalities. This guide draws on the experience of nearly 10,000 AmStaff owners to reveal the truth about this often misunderstood breed. Want to learn more about caring for an American Staffordshire Terrier? You're in the right place.

Australian Shepherd Facts: Breed Info & Care Guide
Discover the Australian Shepherd, an AKC breed celebrated for its trainable, playful, and affectionate nature. Despite its name, the Australian Shepherd is actually a native breed to the United States, originally developed to breed on farms and ranches. Considered a medium dog, Australian Shepherds were bred for herding beginning in the 1950s. As one of the high-energy breeds, Aussies are known for their boundless energy and need for regular exercise, including aerobic exercise.

Essential Husky Facts for Owners: Breed Guide
Discover the Siberian Husky, a breed celebrated for its curious, intelligent, and loyal nature. Considered a medium-sized dog, Siberian Huskies were originally bred in Russia for sledding, beginning in the early 20th Century. Today, they're one of the most popular active breeds in North America.
/354x256/wp-content/uploads/2024/07/German-Shepherd-Dog.png)
/354x256/wp-content/uploads/2024/07/Screen-Shot-2024-07-24-at-4.06.05-PM.png)
/354x256/wp-content/uploads/2024/07/Screen-Shot-2024-07-25-at-3.05.09-PM.png)
/354x256/wp-content/uploads/2024/07/staffy.jpg)
/354x256/wp-content/uploads/2024/07/Screen-Shot-2024-07-25-at-3.39.43-PM.png)
/354x256/wp-content/uploads/2024/07/catherine-QMumx6XMJSY-unsplash.jpg)